Categories
Casserly Consulting Blog

Tip of the Week: Filters and Labels Help Organize Your Gmail Inbox

gmail_icon_current_400.jpg

Gmail is an excellent tool for business use, even more than many business owners may realize. Did you know that it even has the capability to keep itself organized? For today’s tip, we’ll go over how to use filters and labels to keep your Gmail inbox organized and easy to use.

An Intro to Labels and Filters
Labels and filters are just a few ways that Gmail can help to keep your messages organized. You can assign rules that are applied to messages as they come in. These rules make a filter, which analyze your incoming messages and ensure that these messages are sent to the right label. These labels allow you to view messages more conveniently, consolidating those that have certain factors in common.

For example, you could create a filter that assigns a particular label to any message that has “Quarterly Reports” in the subject line. That label can then be used to access any and all messages with “Quarterly Reports” in a single, consolidated list.

Creating a Filter
Creating a filter in Gmail is fairly simple.

  • Once in Gmail, click the down arrow in the search bar at the top. This allows you access to greater detail in your search criteria.
  • Fill in the details that you want your filter to pay attention to, whether it is who the email has come from, or if the subject line contains a particular word or phrase.
  • Once your criteria have been established in this window, click in the bottom-right corner of the window, where it says, Create filter with this search.
  • You will be given a list of options, including the option for the message to be automatically ‘starred,’ or marked as important. For our purposes, we are concerned with the option to Apply the label.
  • Next to the ‘Apply the label’ option, there is a drop-down menu labelled Choose label. You have the option to create a new label from here, or select from those you have already made.
  • Once your filter has been properly configured, click the Create Filter button.

Creating a Label
While creating your filter gives you the opportunity to create a label, there are sometimes that you may want to have a label prepared that you can add messages to manually, or to already have one to direct a filter towards. Fortunately, creating a label and adding it to a received message is also fairly simple.

  • In Gmail, click the More option on the left of the screen.
  • From there, click Create new label.
  • Name your label and click Create.

To add this label to a message:

  • Open the appropriate message.
  • At the top, click the Label button. You can also add a label to a group of messages by selecting them before you click the Label button.
  • Select each label to be added. You can also create a new label from this point as well by typing in a new name.

Now you’re ready to take even greater control of your Gmail inbox. For more handy IT tips and tricks, subscribe to the COMPANYNAME blog!
Categories
Casserly Consulting Blog

Tip of the Week: A Secure 2018 Relies on Powerful Passwords

password_strength_400.jpg

Password security is one of the most important parts of using an online account. It seems that the average user runs into the paradox of password security by using either complex, hard-to-remember passwords, or simple and less-secure passwords that put their accounts at risk. Even if the user is aware of the benefits that come from using a secure password, chances are that they will sideline security in favor of ease of access.

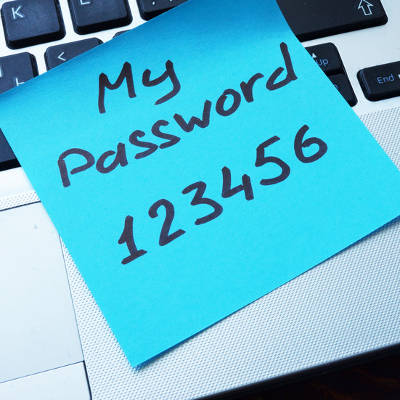
According to a list of the worst passwords in 2017 compiled by Splashdata, some of the worst passwords included “password” and “123456.” These two have topped the list since at least 2010, when Splashdata made their debut survey. Other passwords included in the top five include “12345678,” “qwerty,” and “12345.” Even “starwars” made the list at #16. For further reference, you can view the list of the worst passwords in 2017 here .

Best practices for password security are relatively well-known, especially considering how many experts study this particular field. Here are some tips from the guidelines recommended by the United States Computer Emergency Readiness Team, or US-CERT. In fact, US-CERT was created by the Department of Homeland Security for the specific purpose of preserving online security against threats.

Some sites or applications force users to use these best practices when creating a password, so do yourself a favor and keep these in mind:

  1. Use different passwords on different systems and accounts.
  2. Don’t use passwords that are based on personal information that can be easily accessed or guessed.
  3. Use a combination of capital and lowercase letters, numbers, and special characters.
  4. Don’t use words that can be found in any dictionary of any language.
  5. Develop mnemonics (or spoken memory tricks) such as passphrases for remembering complex passwords.
  6. Consider using a password manager program to keep track of your passwords.

COMPANYNAME is of the firm mind that you should never underestimate the importance of network security best practices–particularly password security. To learn more about how you can secure your business, reach out to us at PHONENUMBER.

Categories
Casserly Consulting Blog

Tip of the Week: 5 Handy Android Shortcuts

little_green_android_400.jpg

With business becoming more and more mobile, there is a greater need for the devices we use to offer features that allow the user to boost efficiency and avoid downtime. It just so happens that Android devices come with a few little-known ways to accomplish these goals. For this week’s tip, we’ll go over a few ways your phone can be used more efficiently.

Fast Snap
If there are two apps that you use frequently, and often need to switch between as reference, you’ll appreciate this feature. Pressing the overview key (the little square icon) will switch you between the two apps you used most recently. If you are on your device’s home screen, this action will pull up the application you were using last.

Fast Vibrate/Do Not Disturb
We’ve all been in a position where a sudden ringing of a phone would be frowned upon, a situation that’s extremely likely in a business setting. If you find yourself in such an occasion and you realize your phone is still at full volume, you can simply activate the screen and hold the volume down button. This will set the device to vibrate mode.

If vibrate is still too loud, pressing the volume down button once again after the phone has been set to vibrate will activate Do Not Disturb, saving you from having your phone go off at an inopportune time.

Notification Customization
If a particular app is interrupting your workday needlessly, you can tell your Android device under what circumstances that app can provide you with a notification. When the next notification pops up, press and hold the notification until you are offered the opportunity to dictate when the app can ping you through some additional settings.

Freeze Reboot
If you ever find yourself with an inexplicably locked-up and frozen device, you can force it to reboot with the Power and Volume Up buttons. Pressing both down simultaneously for anywhere from 10 to 15 seconds will cause your device to restart. If it doesn’t, that may be a sign that something more serious is happening, or that your phone simply needs a recharge.

Power Button Ends Call
If you’re like most business users, you’re busy from the beginning of the workday to the time you clock out. This is especially true if your work takes you out of the office. To save a few extra moments of time, there’s an easier way to hang up a call on your Android device. Instead of fumbling around to press the end call button on your touchscreen, the power button can be used to end the call.

In your settings, access Accessibility and engage the Power Button Ends Call setting. This enables you to end a call with a much easier gesture that you can successfully pull off without looking.

Categories
Casserly Consulting Blog

Tip of the Week: How to Type Accent Marks and Symbols

letters_swirl_pink_400.jpg

When it comes to businesses-to-business relationships, the global impact of the Internet has unlocked quite a few doors. Rather than developing relationships with exclusively businesses in their region, it’s not uncommon for a small manufacturer of model airplanes in Iowa to use the web to find the vendor that can meet all of their needs, even if they’re located in Austria. Doing business internationally means there may be an occasion where you’ll need to communicate in another language. Fortunately, for Windows 10 users, it has never been easier to switch your computer or mobile device’s language.

First, hover over the taskbar and right-click. Select show touch keyboard button.

Cortana

You’ll now see a keyboard icon next to your clock and calendar on the right-hand size of your taskbar.

keyboard icon

This will bring up a touch keyboard. In the case that you don’t have a touch screen, you can also click on the buttons with your mouse.

Touch Keyboard

Click and hold the base letter to see all the possible accents for that letter. Click the one that you would like to insert.

keyboard accents

For those who are going to be writing in another language on a regular basis. It’s possible to change the entire layout of your keyboard. Your chosen language can be found to the right of the touch keyboard icon.

EnglishRussianKeyboard

This doesn’t just apply to the touch keyboard. It applies to your physical one, as well.

Hint: If you don’t see the language you’re looking for in the list of available languages, you can add and edit your list by selecting Language preferences.

Using Another Version of Windows?
For those of you who are using Windows 7 or 8.1 (or even Vista or XP), in addition to seriously thinking about upgrading your operating system, you can still use ALT Codes . A numeric list of codes is assigned to the accented letter or symbol in question. While pressing down the ALT key, type the four-digit code on the numeric keypad at the right edge of the keyboard.

Do you have any tips or tricks that use you like use when communicating in another language? Tell us below! Comentario a continuación! Commentaires ci-dessous! Комментарий ниже!

Categories
Casserly Consulting Blog

Tip of the Week: Is OneNote or Evernote Better for Your Needs?

evernote_onenote_400.jpg

The ability to take notes is invaluable to business, but the ability to take cohesive, well-organized notes is essential. Therefore, it is important to utilize a solution that enables you to do so. For this week’s tip, we’ll compare and contrast two note-taking applications — Microsoft OneNote and Evernote — to evaluate which will better serve your needs.

What OneNote Has To Offer
OneNote offers a fairly comprehensive suite of features to its user, offering a wider variety of tools than Evernote does. Depending on the platform you use, you can draw, record a quick audio or video clip, add images and spreadsheets, and share everything with other users — all in addition to the basic text-based note function.

The way it is set up, OneNote also enables the user to remain well-organized in a logical and sensible way, with the ability to create individual notebooks that are themselves able to be divided into sections and subsections, each divisible into pages. The many functions that OneNote allows are divided into a tabbed system similar to what can be found in the Office applications. This interface is most prominent in the Windows version, with similar (if less comprehensive) features in the Mac, iPad, iPhone, web, and Android versions.

OneNote’s major flaw lies in its web clipping function. When content is clipped from a webpage and added to OneNote, it is added as an image. As a result, links and videos and other similar content will not work, and you can’t copy and paste any content from the clipped webpage. It is also only available to users with a Microsoft account.

Finally, OneNote utilizes OneDrive to keep itself synced across all of your devices. Depending on what version of Office you use, your OneDrive storage space allotment will vary. There is also the option of purchasing additional storage space through various plans.

The Features of Evernote
Evernote offers the same basic functionality as OneNote, but there is still enough of a perceptible difference that the comparison between the two feels a little like comparing apples to oranges. While Evernote also allows the user to create notes and such from scratch, it has clear strengths in its capability to clip web content.

Rather than just taking a screenshot of the web page, Evernote provides a toolbar application that allows the user to capture content in a variety of different ways. A user can grab the article alone, without ads and extraneous content, or just the stripped-down text and graphics, sacrificing the original formatting. Evernote also accepts the full page, a working bookmark to that page, and yes, a screenshot of a particular page.

The clipper also allows you to add tags, as well as notes by adding text, highlighting what’s there, drawing on it or adding arrows, and more. Plus, the only element to a captured page that isn’t live and editable are things like videos. However, clicking on the video in Evernote will take you to the original page where it can be viewed.

Evernote shows some significant changes between its versions for Windows and Apple devices, making the Apple device versions a little trickier to navigate than the lists that the Windows version showcases. The web and mobile versions have a shortcuts feature that enables the user to save a quick link to a particular note in a special favorites menu.

Evernote comes in a limited, trimmed-down free version, as well as in various subscription models for differing price points and data caps.

Why Not Both?
Clearly, both OneNote and Evernote have their specific strengths, which translate into improved capabilities for certain tasks. As a result, it may best suit your needs to have a version of each, which is made easier if you only require the free version of one or the other. You may want to use Evernote to compile research for a given project, and OneNote to map out the project and take notes for reference.

One thing to keep in mind, although both systems are relatively secure, business owners will want to make sure employees aren’t storing sensitive company information on their own personal OneNote or Evernote accounts. Both services offer business/enterprise versions that let you manage and control your data.

Whichever approach you take, COMPANYNAME is here to help. Call us at PHONENUMBER for more information, and be sure to subscribe to this blog for more tips every week!

Categories
Casserly Consulting Blog

Tip of the Week: Sync Your Inboxes with IMAP

multi-device_email_400.jpg

How many emails do you send on a daily basis? You use it so frequently that you might not second-guess how it actually works. Depending on the way your business uses email, you might be able to optimize the way that it works for your mobile devices. There are two types of protocol that work to varying degrees for your email solution.

The first kind of email protocol is called POP, or Post Office Protocol. This can be seen in a similar way to snail mail. POP works by downloading messages to your device from the mail server through your email client. However, this keeps you from downloading the messages onto other devices. If you want to check your email on your smartphone, the same messages will not be accessible on your desktop–it’s just the way it works.

On the other hand, you have the preferred method of handling multi-device email: IMAP, or Internet Message Access Protocol. IMAP stores the messages live on an email server rather than downloading them directly to the devices. This means that the messages remain on the email server and are accessed by a mail client on any device you use. Any actions performed on the messages are done so through the mail server. This is the best way to use email if you’re hoping to keep your messages in sync across your devices.

Modern email systems generally allow for IMAP, including Google’s Gmail, Microsoft Outlook, and Mozilla’s Thunderbird. Some, like Apple’s iCloud, even default to it. Depending on your business’ needs, you’ll want to implement a communications solution that allows your team to access email on a multitude of devices–that’s where we come in.

If your business is unfamiliar with mobile devices, COMPANYNAME can work with your organization to ensure that your mobile device policy matches up properly with your email client. You want to ensure that any devices accessing company information are secured from end to end. Furthermore, these devices need access to information unimpeded so that productivity can commence. We can work with your organization to make this happen.

To learn more about email, mobile devices, and business technology for a modern workforce, reach out to COMPANYNAME at PHONENUMBER.

Categories
Casserly Consulting Blog

Tip of the Week: Would Remote Workers Benefit Your Business?

remote_worker_pros_vs_cons_400.jpg

If you allow your workforce to work remotely, your business can flourish under the right conditions. You still need to think about the risks associated with it, though. If you’re not careful about your remote work strategy, it could blow up in your face. Here are some of the ways you can minimize the risk of remote workers.

The Benefits of Remote Work
Have you ever stopped to consider that a lot of your budget is spent paying for rent and other utilities, like heat, power, and air conditioning? These are some of the major costs associated with operations. You need to pay for these services in order to actually make a profit for your organization. However, if you downsize your office space and eliminate unnecessary expenses, you can take advantage of new opportunities. You also provide your employees with more flexibility so that they can work how they want. Thanks to this flexibility, you can provide your workers with benefits that they may not be able to find elsewhere. That’s not even mentioning that you can hire anyone from anywhere, eliminating geographical barriers for good for any new hires.

A good example to consider is how a remote working plan could help parents with young children. They need to work, but it’s also important for them to spend time with their new family. A flexible schedule is the ideal way for a parent to keep their work schedule while taking care of their kids, allowing them to be there when it’s needed. The freedom and flexibility associated with remote working can help you retain employees, as it costs more to hire new employees than keep current ones.

The Downsides
The freedom and flexibility that comes from remote working can also be a major issue. What if the worker decides to just throw away the workday on chores or television instead of doing their work? These types of distractions don’t exist in the office environment, but they might prove to be too irresistible to the remote worker. Plus, remote employees have been known to suffer from reduced communication and interaction skills with their coworkers, which can limit productivity and morale.

Correcting the Downsides
To keep remote workers from holding your business back, you should focus on hiring only remote workers that have strong communication skills and use them to foster a sense of connection during the on-the-job training stage. You should periodically check in with your remote workers to ensure that they are working properly and to remind them that they are an important part of your workplace. Make sure that they feel valued and develop camaraderie. However, there is a fine line that you don’t want to cross here, as a misstep could lead to micromanagement.

Having the technology to ensure your workers can collaborate is a crucial step toward making sure your business is ready for this development. Technology can reduce the gap between your in-house and remote workers to create a great workplace for your entire staff. To learn more about remote workers and managing them effectively, reach out to COMPANYNAME at PHONENUMBER.

Categories
Casserly Consulting Blog

Tip of the Week: Saving a Windows Product Key to a Microsoft Account

iconic_product_key_400.jpg

To activate Windows 10, every user will need a product key. Every legitimate version of the software has one, but often times, users will need the product key later down the road, only to find that they’ve lost it or tossed it. For this week’s tip, we’ll describe a way to link your software’s product key to a Microsoft account so that you’ll never lose it again.

Step One: Get a Microsoft Account
In order to link your Windows 10 product key to your Microsoft account, you’ll have to have a Microsoft account. If you don’t have an account under the Microsoft umbrella (hotmail, live, outlook, etc.) and depend on another platform such as Google or Apple, have your IT administrator set up a Microsoft account for you. This way you can know you have an authorized account that is ready to go.

Step Two: Link the Product Key to Your Account
Now that you have a Microsoft account that is authorized by your organization’s IT administrator, you can log in and navigate to Settings in the Windows 10 Start Menu. Click on Update & Security, and then on Activation.

The Activation page will read “Windows is activated with a digital license”. If it doesn’t, you can stop because your product key doesn’t enable you to digitize your license and you won’t be able to link your Microsoft account with Windows 10. If this happens to you it is important that you keep your Windows 10 product key on file.

If you have a digital license, you then have to change your type of account to successfully link your Windows 10 product key to your Microsoft account. To do this, open Settings and then click on Accounts. You will then click on Your Info. Find the hyperlink on the page that reads “Sign in with a Microsoft account instead” and click on that.

You will then sign in using your Microsoft account using your username and password and click the Sign In button at the bottom of the screen. Enter your Windows password if it is different, otherwise click Next and it will ask you to Set up a PIN. If you don’t want to set up a PIN, you can click on the “Skip this step” hyperlink on the left side of the box.

Step Three: Verification
To check to see if this process has been successful, open your Settings, click on Update & Security, click on Activation, and you will see “Windows is activated with a digital license linked to your Microsoft Account” under the Activation subheading in the main box under Windows.

To protect your software and yourself, knowing the best practices of software management is important. If you would like to know more great tips and tricks in Windows 10, visit our blog regularly.

Categories
Casserly Consulting Blog

Tip of the Week: Using Your Computer to Its Full Potential

just_the_tips_400.jpg

Your computer, and the many resources you use it to access, are made for utility. As a result, there is an assortment of useful features built into many commonly used systems and solutions. For this week’s tip, we’ll go over some of the shortcuts that you may not have known about.

For Windows
The Windows operating system itself comes with a few shortcuts that can make using your computer much more convenient.

A cluttered screen can be extremely distracting, but minimizing and maximizing each window each time you need a different one can add up to be a major time sink. Arguably even more so, it gets annoying pretty quickly. Windows provides a fix that sounds a little silly — to quickly minimize every window other than the one you want to keep, click and hold the bar at the top (where the minimize, full screen, and close buttons are located) and shake your mouse. All other active windows will minimize. Repeating this action calls your windows back to your display.

  • You can also use your taskbar to accomplish a similar result. Pressing the Windows key and the number of the application on your taskbar will open it, and then can minimize and maximize it.
  • If you have a file selected and you need to rename it, pressing F2 will allow you to do so without right-clicking and selecting Rename from the options.
  • If you want to speed up deleting a sentence you just typed, pressing Ctrl as you hit backspace will delete your text word-by-word, instead of character-by-character.
  • Windows also makes it easier to take specific screenshots of your active window: all you have to do is press Alt and Print Screen.

For Chrome
Google Chrome is a highly utilizable browser, with plenty of shortcuts and features baked in.

  • We’ve all had those searches we regret, and Google never seems to let us forget about them–until now, that is. Using your arrow keys, select the unwelcome suggestion, and press Shift + Delete to eliminate it.
  • If you’ve ever wanted to move multiple tabs to a new browser window, you know how quickly the back-and-forth gets old. By holding Ctrl, you can select multiple tabs and drag them to an existing window or create an entirely new window.

For Any Browser
If you aren’t a Chrome user, there are still plenty of shortcuts that will work for any of the popular browsers.

  • Selecting text in a web page can be frustrating, as you can easily grab an unwanted chunk by drifting your mouse too far one way or another. This can be avoided by clicking in the text where you want to begin highlighting, then pressing Shift as you click on the end of your desired segment.
  • You can quickly access the address bar at any time by pressing F6, or Ctrl + L.
  • Once you’re done with one of your tabs, middle-clicking it will close it.

How many of these tips did you know about? Are there any you know of that we missed? Share them in the comments!

Categories
Casserly Consulting Blog

Tip of the Week: How to Write a Better Email

email_envelopes_purple_400.jpg

Writing an email is one of the most prevalent methods of communication in the business world, but it’s not as easy as you might think. There are considerable details and intricacies to mastering this art, and we’re here to help. By the end of this blog article, you’ll be armed with five tips to write the most effective email that you can.

Keep It Short
Nobody wants to read a long message in their email. After all, they likely have more pressing matters to attend to, and many more messages that they have to read. Therefore, it makes sense that you get right to the point when you have to send an email. Try to include only information that’s absolutely critical. Remember, concision is the friend of any businessperson, as they only have so much time in a day to read and respond to messages that aren’t mission-critical.

Present a Clear Subject Line
Similarly, you want to use only the most clear and concise subject lines, as anything less could mislead the recipient into thinking that the message either isn’t important or doesn’t warrant immediate attention. Basically, you want to provide enough information in the subject line to give the recipient a reason to open it.

Personalize the Email
You shouldn’t be copying and pasting a catch-all message into an email. You should take the time to personalize each message that you send so that it looks as authentic and genuine as possible. You should always use your full name, as well as the organization you belong to–especially if you are sending messages to vendors or clients.

Perform a Spelling and Grammar Check
Nothing is more embarrassing than making a major spelling or grammar error in an important email. Thankfully, this can be avoided by giving your message a quick proofreading before hitting the Send button. Try to avoid statements in all caps, as they can create a subtext that you don’t necessarily want to convey.

Keep it Business-Friendly
If you’re going to send a bunch of memes or other fun things to your employees, it’s best not to do it through email. It’s one thing if you have a dedicated email thread designed for sharing information unrelated to work, but when you have your employees sending things that have no place in a professional environment, you get clutter (and a general lack of focus), both of which can create an unproductive workplace environment.

For more information on how to make the most of your email, reach out to us at PHONENUMBER.